

Fancy building your own ATB deck?
Well now you can!
In this article I aim to give anyone thinking of building their own landboard a good idea of how to go about it, by sharing my experiences of designing and creating decks.
From this...

To this...

First off
Anyone embarking on this sort of project needs a few things; dedication, patience, spare time, a good supply of materials and the use of a decent selection of tools. If you haven’t got these, then don’t bother starting out! 
If you have them, then you shouldn’t find it too hard to finish up with a really quality bit of work!
My custom decks started off as a piece of school Design work; the big project to end my A-level D&T course with. We were given a reasonably free reign to choose our own ideas, so I went for boardbuilding as it looked an exciting challenge, and I could get a new deck out of it to save my hard-earned cash for kites!
When I started the project I was riding a ’03 Scrub Lion Canyon, which was a little basic and rather short in stance for my liking. The basic premise of the project was to create something more suited for an adult stance, a board that would take the fittings from the Lion Canyon (keeping costs down!) and would be nice and stable at speed.
I figured creating a super-lightweight deck for tricks could be difficult in the time period I was allowed, so I took the easy option instead...
Initial Preparation :
After spending a couple of months doing some of the rather dull paperwork for the project folder, it was on to concept ideas and the real research! I looked around at several sites on the web to investigate suitable materials and manufacturing processes.
This page :
http://www.hugh308.homestead.com/tutor_longboard.html
was particularly helpful and provided some valuable inspiration and ideas, although in the end I changed several of the basic points to make the build method suitable for a proper landboard deck.
I then did a few sheets of various concept ideas and my thoughts for each- this usually gives you a better idea of how you are going to actually go about construction, helps you eliminate bad ideas and develop those which look promising!
I decided on a wood laminate of ply sheets for the deck, which would be relatively simple to put together and reasonably cheap materials-wise. I would use a former to bend in the curves for the kicktails, and a strong adhesive to bond the laminate layers together.
Materials :
If you are building your own deck, then you’ll first need to decide on a material for the deck. In this article I will detail using plywood, mainly as it was what I’ve had experience of doing! Secondly, it is pretty cheap compared to the other options, such as carbon composites which require more complex and expensive equipment to work with, and which you are less likely to have access to...
I decided on a Russian Birch ply for my raw wood; a couple of large 3-ply 1500mm X 1500mm 3mm thick sheets cost me the princely sum of £16, and provided me enough wood for at least two and a half boards… This was a bit of a gamble, as I hadn’t actually seen the wood before ordering it, but it all turned out for the best!
You could consider using a marine-grade ply, but they are expensive in comparison, and a standard ply was fine for my purposes. Maple is also an excellent wood for boardbuilding, but again, rather expensive; the birch was perfectly adequate in terms of looks, strength and durability- I have had no problems with my decks so far; so save some money and don’t just buy expensive materials because you think they will be the best, but don’t buy rubbish either!
I chose the relatively thin 3mm sheet as I planned to build the deck up in three layers, so the thin wood was needed to prevent it being;
Too difficult to bendTo stop it straining to bend back flat as much when removed from the former.
Getting the former right is possibly the most important part of the project- I went for a two-part matched former, which would use the weight of the top section to bend in the curves, as well as being clamped to compress and laminate the ply together.
To build this I decided on using MDF, which as well as being pretty cheap, is also reasonably easy to work with, so was the perfect material to make the big block I needed.
For the board hardware there was one easy option for me- to take all the parts off my Lion Canyon and use them! Upgrading to a new board is a fun way to do this sort of project, and a cheaper one too - If you are starting from scratch, then you’ll have to buy the parts in. This will undoubtedly be the most expensive part of the board- buying parts as components brand new is not cheap, although the 'For Sale' sections of kite websites can be good sources of parts if you look carefully.
To stick the wood layers together and create a strong, shaped board, you need a good quality adhesive. Two-part epoxy resins are suited for this type of application, as they create an astoundingly effective bond that will easily hold curves in a deck.
There are several products out there that will do the job, but I bought some Fastglas polyester resin, as it is widely available (check car repair and DIY shops), and reasonably cheap. It comes in two parts, a tin of gloopy yellowish liquid (the resin) and a small tube of red paste (the hardener).

Mixing the correct quantities of these together starts a chemical reaction that will set the resin and stick together pretty much anything!
It is worth noting here that resins are pretty nasty substances- they can cause severe skin reactions and allergies, and are pretty bad for the environment as well. Avoid breathing in fumes and getting them on your skin if at all possible.
Construction :
Construction will probably be quite time consuming, but hopefully with this guide, if you build your own you can avoid some of the pitfalls and likely delays you may encounter along the way!
Firstly, I suggest you develop your ideas to a stage in which you are happy to start your build.
Have the size of deck you want decided, your materials ready and components gathered. For my deck, I had pages of measurements, a plan drawing of the deck and a full-scale flat template/model of half the deck to refer to.
The Former :
First up for construction is the former- get this right if nothing else; once you have it you’ll be able to build as many boards as you have resin and wood!
As I was building a long deck, my former had to be longer still! Both my formers are approximately 40mm longer than the finished decks, to give you a rough idea of what you should aim at. Allowing this extra length lets you cut the ply and lay it up leaving some margin for error when cutting out the shape in the finished laminate.
For my formers I used MDF (Medium Density Fibreboard) as the raw material- it is soft enough to work with and cut the necessary shapes from, and was easy to stick together and make a big chunk ready for cutting.
After getting a set of 1220mm x 250mm lengths of 12mm sheet cut to size, I used PVA to glue them together. I suggest you use a good number of evenly spaced clamps to hold layers together while they dry- getting a good tight bond between layers is important for what you do next.

Gluing the former.
A 70-80mm thick former should have sufficient depth to cut the curves needed to curve a deck to fit skate style trucks. For a deck with channel trucks you will probably need to make a thicker former to give enough depth for the steeper kicktails you need to get channel trucks working effectively.
Once my former was dry, I marked out the curves for the deck along one long face. I added a bit of a convex bend upwards in the middle to prevent my weight from making the deck sag too much, and kept the curves nice and smooth, using a roughly 25 degree bend upwards for the tips- I was only using skate trucks, so this would be perfect.

Marking out the curves.
To slice the big chunk of wood into two matched halves you will need a decent, powerful saw, able to cut the curves you have marked.
For me, the school bandsaw was the only option; it was powerful enough to actually cut the wood, and accurate enough to make a fine cut and keep the halves matching.
A bandsaw is not really the ideal tool for this job, although it will do it- if you find a better option, let me know!
If using a bandsaw, you need a new, sharp blade. The saw will cut to a depth of about 300mm of material, and with a soft material like MDF it will cope reasonably well. However, the thicker the material, the more the blade will struggle, especially if it is getting blunt! It will shriek a bit- take things EXCEEDINGLY slow to keep the cut accurate, and be aware of twisting the blade over with the weight of the wood, to avoid snapping it- if your saw has a short cutting bed, having a helper to take the weight of the former as it comes off the bed is essential as the former is so long.
If you are doing this in school, your teacher will probably do this stage for you (with some worried mutterings to begin with no doubt)!
Also avoid trapping and jamming the blade in the cut slot if you need to remove it before you complete the cut, and if you’ve glued sheets together to make your large chunk like me, watch out for the heat of the blade melting the glue and catching the blade.
Having a chat to a teacher or design technician about your ideas and work is a great idea on a project as complex as this- most will happily help you out and give you some invaluable advice and help at any stage.
Once you have the former sliced into two halves, you are almost ready to begin the actual board.
However, firstly check to make sure the former fits together properly. Glue down any thin slivers of wood that may have come free, and sand both inside surfaces smooth. With my first former I was forced to make each half in two sections due to the blunt blade- it wouldn’t cut the full thickness of the wood! This meant I had to stick two not-quite identical halves to another bit of MDF and then sand them using a handheld belt sander to get them flush- a noisy, dusty and very time consuming task- not recommended!
If your cut has been successful you should get two well fitting halves which are pretty much ready for forming.
The Layup :
Getting your plywood cut to the right length is the first step- you know your board length, so add 40-50mm onto this for safety, and get a set of lengths cut.
My first deck was 9mm thick, so I used three 3mm sheets. I had them 250mm across to match my formers width- this will allow you to line them up easily in the former.
Note here that shaping the board takes place after the layup is complete- it is much easier to cut out a shape from a big chunk of wood than to try and laminate three irregularly shaped pieces of wood together!
When getting the wood cut, ensure you have the main ‘strength’ of the ply running from tip to tip; NOT across the deck; your deck will be rather bendy if you do this!
Take a look at your cut wood and decide which surfaces you want to show. Manufacturers will bore out big knots and cover them with a patch- make sure you point these inwards and don’t have them on the top or bottom faces; as well as looking unsightly, they will provide a way for water to work between layers, so if you thrash your board through puddles a lot they are likely to have the deck delaminating before your eyes!
Once you have decided which sheet is going where (number them to help you remember), then get your former set up…
Ideally, a vacuum bag would be used at this stage to get the wood layers perfectly flush, without any trapped air bubbles... However, I didn't have access to one, so had to make do with a lot of clamps instead, a method which still works perfectly!
Cover your worksurface to prevent any resin drips from mucking it up. Then you can place the bottom half of your former on this, mounted on some blocks of wood to give you access underneath it for attaching clamps. Put the top half behind it, ready to be lifted into place. Collect some decent quality sash clamps (G clamps are NOT ideal for this as smaller ones can bend under high stress).
For my layups I used around 10 - space these around the former, in easy reach, ready to be quickly whipped on.
Cover the bottom layer of the former with clingfilm; this will prevent resin drips sticking the former and bottom sheet together, which isn’t what you are after!

Covering the Former.
I strongly recommend you stick two layers together at a time- you could do more, but it is extra hassle and so keep things simple unless you are in a rush.
Place your bottom layer on the lower half of the former- put the middle half in grab-able distance- you’ll want to get it on quick!
Get some helpers at this point- two people are the minimum to successfully carry out this stage in my opinion.
Safety :
Wear disposable plastic gloves to prevent skin contact with resin. Open windows to keep your workspace ventilated.
Following the instructions on the can, mix up your resin and hardener- a disposable plastic coffee cup is a reasonable mixing container, although a glass beaker will allow you to measure accurately. Stir the mixture thoroughly to ensure the substances have mixed. Depending on the quantity of hardener used and the room temperature, you’ll have a few minutes to get things together and clamped down before the resin starts to cure.

Spreading the resin, with clamps at the ready...
Pour the mixture over the bottom ply sheet, and spread it evenly over the surface, ensuring you get full coverage. Then slap the next layer on and line it up.
Now have your helpers lift the top half of the former on, and keep the ply lined up.
Once the top half is on, the ply will bend down a little. When you set up the former, prop up each end so you have space all around it. You can then start clamping the former together and applying pressure to get a good laminate.

The Former with clamps applied.
Get your clamps on quickly- space them evenly, and do them up carefully to keep the ply from sliding around inside- keep the pressure even as you tighten them. All the clamps should be done up pretty much as tightly as possible- resin will squeeze out of areas under strain, but worry not!

Aligning the Former.
Now, providing you have kept things lined up nicely and have mixed the resin correctly, it should be safe to relax!
Read your resin instructions to find out how long you need to leave it to set- for safety, I left each of my layers overnight to dry, which worked out perfectly.
Repeat this process until you reach the thickness of deck you want! I decided a 12mm thick 12-ply board was right for me in the end. The four layers of plywood I used were flexible, still light, but not as bendy as my prototype 9-ply deck.
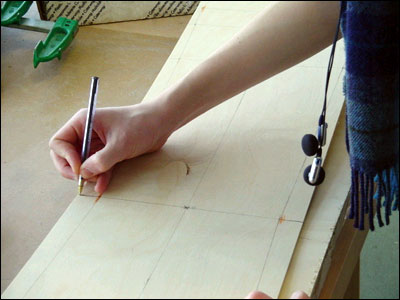
Marking out the top sheet.
Before adding the top ply sheet, I recommend marking it out to the pattern you want cut the final board in on the top sheet –it’s a lot easier to draw it out on the flat than when it is curved! Mark out the position of the truck and binding bolts now as well to keep things simple.
Once this is done, you are ready to get things looking like a real deck should!
Shaping :
Remove the finished layup from the former to begin with- check the resin is completely solid and all layers are bonded properly.
Peel off any clingfilm that may have stuck to the bottom sheet, then carefully sand off any large blobs of resin.
Next you can get the roughcut of your board shape done- either using a bandsaw (nice and quick and neat), a handheld jigsaw with a decent blade, or by hand (not recommended!)…
Be careful not to breathe in loads of resin dust when cutting, or the melting resin fumes if you use a bandsaw- neither will do much for your lungs!

The board after the first roughcut.
When you’ve done this, providing you’ve been accurate, you are well on the way to finishing.

Ready for some more sanding!
To smooth off curves on the board shape, use power sanders, sandpaper, saws and any other appropriate tool you think is worthwhile- work things until you feel they are as accurate as you want them to be and have the shape you want...
To round the edges of the deck off you can use a powerful belt sander to bevel them off, and finish with various grades of sandpaper, or you can find a decent router bit and zip round with that instead.
Getting this right is time consuming, especially if you are a bit of a perfectionist like me!
Next up is drilling the holes for the truck bolts and the bindings- choose the appropriate bit size for your holes, clamp the deck down firmly and go for it- be very carefully with getting things lined up correctly, otherwise you’ll have a struggle getting your trucks on!

Drilling binding holes...
A good fast drill running off the mains is what you want here, as it won’t chew up the wood as much as a slower one, especially with the larger binding holes.
Once all this is done, and you are totally happy with the shape, you are ready for varnishing.
With my board, I left it as natural wood. You could paint the whole thing, but you will want a durable paint and one that won’t strip with the varnish on it.
I found the most effective varnish was a polyurethane floor varnish- built up over a week in about six coats, it has a rock-solid finish that looks beautifully glossy, brings out the wood very nicely and is also durable enough to take riding on sand, mud and through water without letting moisture into the wood or looking scruffy.
When the varnishing is finished (make sure you seal the drill holes by the way!), you can add griptape and assemble the board.

Griptape cut to shape and applied.
Both rubber and sandpaper style self-adhesive tapes are available, you can pick them up at most skate or kite/ATB shops for around £5.
Cut them to whatever shape you wish, line them up, and stick them down in place, carefully avoiding any bubbles or creases. A good sharp Stanley knife and a straight edge will cut tapes, although the sandpaper stuff will blunt a blade rather quickly!
To finish off you board, bolt on all the other components…
Trucks will go on easily- just line up the baseplate the correct way round, push the screws through the deck, add the riser, and slide the baseplate on. Do the screws up nice and tightly and you are done!
Wheels should slide and bolt onto the axles easily, with the bolts tightened to prevent any lateral play. Bindings will bolt through or screw on depending on which you choose- there are loads of types out there now, so select a pair which suit you and fit your budget.
Add some stickers or paint on a logo to add that finishing touch- I made a spray template for the eye design on my first board which looked great!

Adding graphics.
At last- you are done!
Step back and pat yourself on the back for a job well done...
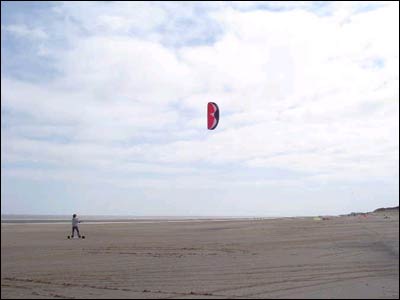
The first test.
Finally- pump up the tires, tighten the trucks and get riding! 
Have fun if you decide to give a similar project a go, and please, please let me know how you get on! - drop a PM my way or post on the forums if you want any advice or comments…
Since finishing the V-1 proto deck a few months ago, I’ve moved on a bit… The V-2 is my current board, and incorporates most of the fixes to the problems I encountered with the first deck- it is pretty light, long and stable, looks the business and rides very nicely!

The V2.
I’m also going to be producing a shorter, more freestyle orientated deck in the near future- I’ve had the former cut recently; it will work on exactly the same principle as the first, but is just shorter!

The Former.
Watch this space to see how I get on!
To finish, I must thank my school Design department for being a bunch of top people and helping me out in all sorts of ways, to everyone else who gave me ideas, to Jerry for the stickers, and of course everyone else here at racekites who have been kind enough to comment and help me!
Cheers...
~Gabriel (aka Wildcard)


Recommended Comments
Join the conversation
You can post now and register later. If you have an account, sign in now to post with your account.