
Search the Community
Showing results for tags 'buggy'.
-
We've got another Kiter amongst us, my father He's purchased his first buggy, a Zebra! Just when you think you've seen it all someone comes up with a great new idea, the original owner modified the footpegs in a way I had never thought. He used small mountain bike bar extensions/verticle grips attached to the straight footpeg then drilled a hole and mounted the heel strap. For anyone else that has a Zebra and wondering, it's actually a really simple, non-destructive modification.


-
Kitebuggy flying under a Moustache!
-
- 1
-

-
- kite buggy
- buggy
- (and 2 more)
-
Hello all! Now this might go unseen as I am not sure how many people may remember my father AndyFly (Andrew, Andy) who sadly passed in 2011 from a seizure. His passion was kiting, buggying, and mostly, being apart of the BrisKites & Extremekites community. On the long weekend of Easter in 2012 my family and I travelled to Yeppoon to meet with many of the kiting community as we remembered dad for who he was, alongside an event that he loved attending (with us AndyFly "maggots" joining the fun 😂) as we scattered some of his ashes on the beach out the front of Driftwood. Our family has so many fond memories of so many different people within this community, and the joy that it their friendship brought Andrew. For the first time since 2011, my mum Linda and I have travelled to Yeppoon to spend the last few weeks remembering the adventures we use to have with dad on these kiting trips and the people that we met. We walked along the same beach today, in front of Driftwood, drawing his name once again in the sands that he once loved. I watched a kite surfer today and it reminded me of the times I use to go and kite with dad in Canberra at the Amaroo ovals at 14 years old, learning how to kite and watching dad fly through the sky in his buggy for hours. So here is a big thank you from our AndyFly family to everyone who remembers dad. To everyone who brought such strong friendships, fun, banter, love and support to dad's life. For everyone who left such kind words after he passed, and who posted such amazing pictures of dad (some of which I am only seeing for the first time ❤️) We are all doing well and hold these memories of you all close to our hearts. Hope to see you in Yeppoon sometime in the future! Jess


-

buggy ISO Leading Link forks or someone who can build me some
Nuclear_icing4 posted a topic in Buy & Sell
Looking for Leading link forks or someone who could possibly build me some for beachracer tyres. Or even just a standard set of forks🤷♂️ Many thanks in advance Matt -
Never has a video cost me so much in time and expense. I hope its not a total waste of yours.:)
- 16 replies
-
- 13
-
-

-

-
 I have been jumping "badly" in my buggy for about a year and its starting to show as you can see in the pic the front wheel is skewed and the rear axle is bent slightly. I have decided to modify a second buggy in these areas in an attempt to stop the buggy getting damaged from bad/heavy landings. After doing some research into the different ways other people modified there buggies it became apparent that most people do there own thing. If you look at other buggies on the beach or in the forums this becomes obvious quite quickly. So it really is a bit of an open book as far as what is the right way to do this. This is the way I have chosen. Time will tell me if it's a good way or not. Before I continue a word of caution. One school of thought says you should never modify the buggy at all. The logic behind this is that if your buggy is being damaged due to impact it is absorbing forces that could potentially damage "you". Also by strengthening the buggy in various areas you might just cause the next weakest part to fail. Taking this into consideration I decided to continue any way as I am heavier than the average buggy jumper. I decided that I wanted a brace over the rear axle and to put strengtheners across the side rails. Rear Axle. I wanted to have a single brace over the total width of the axle. I made it using 38mm OD stainless 316 tubing. I wanted the contact points to be almost to the end of the original axle so that it gave me the strongest fixing and was therefore welded onto both threaded bosses. Some axles are supported further in from the ends on the tube wall. This can still allow the original axle to bend at the weld points. The tubes were purchased at a local steel merchant. I also bought a 90degree bend. Which I then cut onto two 45 degree sections to provide me with the equal bends either end. Before the tubes can be welded I needed to prep the tube ends so that there was a minimal gap for the welder to fill. This is quite straight forward around the bends where straight butts are all that are required. Not quite so easy around the area where the brace sits on the original axle. You have to allow for the removal of the material when you cut it to length. If you mess this up then the brace could end up to short. I used a hack saw, various round and half round files and a protractor to prep the joints. This is quite time consuming but the results are worth the work. I wanted to have the axle brace welded in a position where it would give the optimum support, but not be right behind my back when I landed. I decided to weld the brace with a 60 degree angle between the brace and the side rail connections. This would leave the brace leaning slightly back in the finished buggy. Side rail strengtheners. I took the basic idea from a document that Stupid Dave (Flexi Pro Rider) had of his trick buggy mods. Highly recommended if you can get hold of this as he also shows other potential mods. The strengthener consists of a bar and two posts that effectively tie the two side rails together. This should provide extra rigidity that will help to stop the front end twisting. The materials I used were from an old damaged Radsails buggy. I basically cut up the rear axle to provide me with parts that I needed. Again the forming of the tube ends is quite tricky here as you have to ensure that all the butts are good for welding. I found that using some electricians tape here was very helpful to keep things together. Once the joints were prepped I was ready for the welding. As I did not have any access to suitable welding gear (MIG or TIG) I needed to find someone who could help me out. A friend of a friend came to my rescue and I managed to get the job done for a few quid. I was lucky, but there are many small workshops that could have done the job for me. Price is usually quite high for welding though. Again here is where the prepping of the welds can save a lot of money as the welder can work quickly. Once back from the welders, the frame was stripped and welds polished off to give a nice clean finish. The weld form was left visible and not polished out as I want it for strength. A basic drill, polishing discs and polishing soap were used to achieve the required finish. Warning; do not press to hard when using the drill as it can burn the motor out. (I found out the hard way) I had a little help in this area from one of the buggy polishing maestros. Guess who? One of the problems with welding the side rails is the welding causes the frame to buckle as the weld is forming. This means that some force is required to get the side rails and rear axle back together. It also meant that the down tube is now very tight into the front clamp. The buggy is now effectively one piece as far as transporting to and from the beach it is concerned. Seat mods. The Flexifoil seat is designed to fit over the side rails before the buggy is assembled normally. This gives you a problem when the side rails have been welded. The seat will not fit because the front two loops are to narrow. In order to get the two parts to fit modification of the front loops is needed. I machine and then hand overstitched two lengths of webbing onto the loops this allowed me to fit a plastic buckle to each side of the seat. Now the seat can be fitted to the side rails. Do this before fitting the down tube. With the frame of the buggy assembled the seat buckles can be tightened. I wasn't sure about the plastic buckles at first but they do seem to holding up during use. If they prove to be a weak point they can be upgraded to steel or the strap could be stitched together. I have also made a single lap strap for my bug as I prefer this over the three belt system. With the addition of the barrows and a belly pan the buggy is ready to fly. Note: jumping buggies and using lap belts will hurt. Maybe sooner, maybe later. But it will happen. You have been warned.
 -

Version 1.0.0
9 downloads
Printable full size plans for a Flexifoil Buggy Belly Pan. Also known as RIP: Rectal Impact Protection -

Version 1.0.0
14 downloads
Peter Lynn Buggy Manual for Comp ST, Comp XR+, Folding and Bigfoot -

Version 1.0.0
9 downloads
Plans for a few different kite buggies. -
Each year I make it a goal to visit one of Australia's premier Land Kiting destinations, Kingston SE. This marked my 7th year visiting Kingston, nowhere near the 20+ @The Duke and @AliNev have been going. Each year I go to experience the one thing I can't find here at home, and that's a dry lake/claypan. Kingston is an amazing place, over the years I have collected some amazing footage. This video I've choosen to focus on claypan and why I travel to Kingston for it each year. Please turn your speakers up as loud as they can go... Thanks for watching, please share this topic with your friends
- 28 replies
-
- 17
-
-

From the album: Trickbitz Tornado
-

From the album: Trickbitz Tornado
-

From the album: Trickbitz Tornado
-

From the album: Trickbitz Tornado
-

From the album: Trickbitz Tornado
-

From the album: Trickbitz Tornado
-

From the album: Trickbitz Tornado
-

5 downloads
Manual for the Scout Flexifoil Buggy. -

13 downloads
The manual for the original Flexifoil Buggy designed by Rob Hills. -

9 downloads
The Flexifoil Navaro kite buggy manual. -
Brand New Never used Peter Lynn Kite Buggy. Has been put together... Instruction manual included. Located in Frankston. $ 200 It has been in storage for about 8 years.. or so.


-
Asking $2000 for the lot open to reasonable offers Peter Lynn kite buggy Bomba 13 kite surfing kite 3.6 water foil 2.4 water foil 2 x harness’s Spare lines Spare bar Replacement value over $4k Open to reasonable offers, this setup was amazing and I could go out in all conditions with this variety of kites. Don’t have time to use it any more unfortunately. All gear is in good working order with no issues.


- 2 replies
-
- 1
-

-
- Peter lynn
- bomba
- (and 2 more)
-
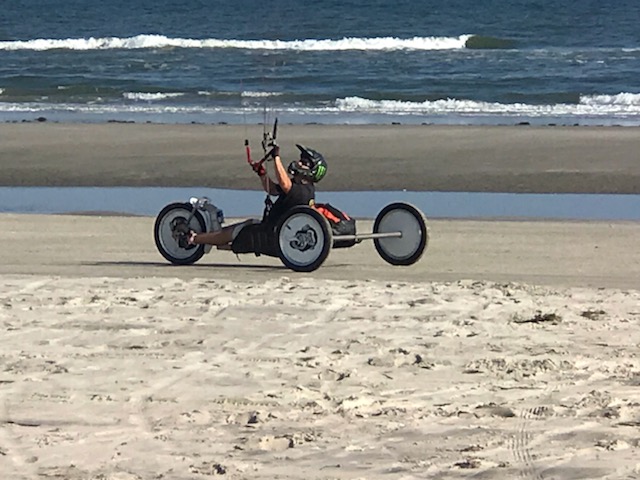
Oct.8-14th was the Wildwood buggy bash held in Wildwood NJ, Usa. What started as a weekend get together has evolved into a week long gathering of buggy, boarding, and blokart family. This year, those who arrived early were treated to some amazing onshore winds courtesy of Hurricane Michael. Wildwood beach is approximately 7 miles of amazing hardpack facing the Atlantic ocean. This year we had 4 GT buggies, a PTW and 2 MG Supras as well as the assortment of PL and Flexifoil buggies. Having upgraded my gear this year allowed me to set several PB's. I buggied more this bash than all my previous ones combined.


-
Got a low-wind run at Venus bay yesterday and it was GREAT! The wind was dead on which opened up the whole of the bay (all 20 plus km of it), and although the tides weren't really low, there was still plenty of beach to be had. Interestingly I had more dog attention than usual - I think because the kite is black and looks more like a huge bird of prey. Fortunately I was going pretty slow when I nudged the Collie. As for the Jack Russell - he just took one look at the kite and ran . . . and ran . . .and ran. The Spleene was every bit the low-wind monster all the reviews indicate. Hope the video gets you in the mood!
-
The YouTube video of our session at the Wanna sand dunes in our GT Race buggies. No sound track just the sound of a coupla dudes having a blast.. Short version
- 6 replies
-
- 6
-
-
- Port Lincoln
- Dunes
- (and 1 more)


